Coraline Doll Pattern An Original Design by Elizabeth's Kitchen Diary Pattern for personal use only. Not for sale or distribution.
Supplies: 1/2 metre flesh coloured cotton fabric 1/2 metre yellow vinyl-type fabric 1/4 metre denim fabric (old ripped jeans work well) 1/2 metre pink/red striped t-shirt fabric (an old t-shirt works well) 1/4 metre strong black felt 3 inches thin skirt elastic 2 small yellow buttons coloured threads: dark brown, light brown, orange, yellow, pink, white, grey and flesh coloured polyester toy stuffing 6 inches velcro 100 grams blue 4-ply yarn 1 yellow glass bead 60 small pink glass beads 7 blue glass beads 10 inches fine silver beading wire pins sewing needle and machine curved tapestry needle 13 cm 9mm hardwood dowel rod
Skill Level: ability to embroider and use a sewing machine essential
Instructions: The Doll Head! 1. Trace out the face front pattern pieces (left and right) onto your flesh coloured cotton fabric taking care that the eyes, mouth and freckles are lightly drawn on in pencil. 2. Embroider the eyes, freckles and lips using coloured thread. The eyes and eyebrows are the same colour light brown and the pupil of the eye is dark brown. Using a single orange thread accent the eye near the pupil. Embroider light grey freckles and light pink lips. Embroider a light grey line with a single thread around the outside of the eye and a light brown line around the iris. See photo on website. 3. Cut out all the face pattern pieces. 4. With right sides together pin the two front face halves together matching up nose and lips and sew down the front (nose side) with a 1/4 inch seam. Zigzag edge with the smallest setting on your machine, if you wish. You may need to embroider a little bit more to make the lips join across the seam. 5. With right sides together, pin centre of Top of Head piece (marked as C1) to the seam join at the top of the face front pieces. Sew with 1/4 inch seam. Zigzag edge. 6. Sew ear halves together leaving the end (marked A) open. Turn right side out, lightly stuff, and embroider an accent C shape in flesh coloured thread where marked on the pattern. 7. With right sides together pin ear pieces facing inwards so that they are level with the bottom of the eyes (marked A on the pattern, the seam for ear positioning is marked B.) and pin the Back of Head to Top of Head (match up points marked C2) and continue pinning along the face front edge. There will be a 1cm gap where the neck will be inserted. Sew, leaving this gap open, with a 1/4 inch seam. Zig-zag edge. 8. Turn right side out and stuff lightly (more stuffing will be added later).
The Doll Body! 1. Sew Body parts together with a 1/4 inch seam leaving the bottom open. Turn right side out. 2. Sew arm parts together leaving shoulder gap open. Turn right side out. Lightly stuff fingers and embroider the fingers with flesh coloured thread as marked on pattern. Stuff until arms are firm until you reach the elbow. Hand sew across the elbow joint with flesh coloured thread if you want the elbow to bend. Turn open ends inward and hand sew edge shut using flesh coloured thread. 3. Sew leg seam and turn right side out. This is a right pain to do but persevere. Use a knitting needle and a pair of tweezers to help you, just make sure you're gentle with the pointy end of the knitting needle and don't stick it through the fabric! Stuff until firm until you reach the knee. Sew a knee joint if you want the knee bendable and then continue to stuff until firm. Turn open ends inward and hand sew edge shut using flesh coloured thread. 4. Put a little stuffing into the top of the neck and insert dowel rod. Using a pair of tweezers add more stuffing around the wooden rod in the neck until firm. Stuff body until firm, taking care to keep the dowel rod in the centre surrounded in stuffing. 5. Turn open edges at the bottom of the doll body inward and hand sew shut using flesh coloured thread. 6. Hand sew arms and legs onto the doll using flesh coloured thread. 7. Stuff the head until firm leaving a space for the neck to be inserted (stick your finger in and wiggle it around so there's a gap). Turn open edges on neck opening inward and hand sew the head in place using flesh coloured thread. The neck will go quite far inside the doll's head. This is to keep the head from flopping over!
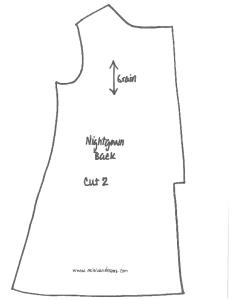
The Shirt! 1. Cut pieces out of pink/red striped t-shirt fabric. With right rides together, pin shoulders of shirt back (left and right) to the shirt front. Sew with a 1/4 inch seam using pink thread. Zig-zag edges. 2. Sew cuffs and shirt bottom over with 1/4 inch edge. 3. Match shirt arms (marked A) with centre seam on shoulders (right side together) and sew with 1/4 inch seam. Zig-zag edges. 4. Pin arm and shirt sides together and sew. Zig-zag edges. 5. To make collar, pin the collar onto the neck area lengthwise, right sides together, and sew with a 1/4 inch seam. Fold over remaining collar, twice, so that you are now working on the inside of the shirt. Sew along the edge to fix the collar in place. Try to keep the seam in the same place as the seam on the outer collar edge. 6. Pin the shirt back pieces together and sew from the bottom up, stopping at the spot marked D on the pattern. 7. Fold the remaining edge on the shirt back and collar inwards and sew into place.
The Jeans! 1. Cut out denim pieces and hem the bottom and top edges with a 1/4 inch seam. 2. With right sides together, sew outer and inner leg seams, leaving the crotch area for now. 3. Turn one leg right side out and insert into the other leg so that the right sides are facing together. Pin and sew crotch area together leaving a 1 inch gap at the top (marked on pattern). 4. Turn jeans right side out. 5. Fold over remaining edges of back of trousers and hem. Sew skirt elastic around the top. Affix a 1/2 inch piece of velcro to either side so that the jeans will stay shut.
The Boots! 1. Cut Boot pieces out of yellow vinyl-type fabric. 2. Sew front toe down the front (marked E) with a 1/4 inch seam. 3. Open up boot toes and lay flat over the top of the Boot Top. Pin in place keeping the bottom edges of the boot flat. Sew as close as possible to the edge over the top of the boot. 4. Turn right sides together and sew up the back of the boot. Turn right side out. 5. Cut Boot Base out of thick black felt. 6. Hand sew the bottom edge of the boot to the boot base the way Doc Martens are stitched together. Stuff toes with polyester filling. You may need additional stuffing in the boot to keep them on the doll.
The Raincoat! 1. Cut all pieces out of yellow vinyl fabric. 2. With right sides together pin shoulders and sew with a 1/4 inch seam using yellow thread. 3. Pin arms to shoulder edges, matching centre of arm with centre shoulder seam. 4. Pin cuff to arm edge and sew with a 1/4 inch seam. Fold over to the back of the arm and sew cuff in place, keeping stitching in the same place as on the front so no seam shows. 5. Sew arms and raincoat sides with a 1/4 inch seam.
6. Pin Hood Top to Hood Sides with the front edges together (make sure the wide section of the hood top is in the front!). Sew with a 1/4 inch seam. I found it easier to do this by folding the side edges of the Hood Top flat and pinning into place. 7. Fold over edges marked with a dotted line and sew into place. 8. With right sides together pin Hood Top bottom edge (the thinner side) to the back of the raincoat collar area. Sew into place. Zig-zag to reinforce. 9. Affix collar the same way you did the cuffs above, folding the front edges in before sewing into place. 10. Hem raincoat bottom edge over. 11. Sew a small piece of velcro on the front neck piece (marked V) and hand sew two small yellow buttons on the outside edge. 12. Hand sew velcro along the inside of the front of the raincoat so it will stay closed.
The Dragonfly Clip! 1. Thread the yellow bead onto the centre of the beading wire and fix into place by twisting the wire. 2. Make four wings using the pink beads, two on each side, fixing each wing into place by twisting the wire. 3. Make the body of the dragonfly by threading the blue beads onto one wire. Turn the wire back up to the centre and join with the other wire. 4. Sew onto the head once the hair is in place.
The Hair! 1. Cut blue yarn into 9 inch lengths. 2. Using a curved tapestry needle thread each piece of wool through the scalp leaving a 1/4 inch gap on either side. Tie wool together gently (as to not break it!) and continue. 3. Sew hair onto the scalp in rows. This is time consuming but the closer you can get the rows
to each other the fewer gaps of scalp will show. I fixed the hair into place using additional pieces of wool sewn into the scalp so that it doesn't flap all over the place. Using very sharp scissors cut the hair so that it is shoulder length. Start longer and cut shorter if need be as you don't want to do this all over again if you cut it too short!
Thank you for downloading my pattern and I hope you found it easy to follow. Do let me know what you thought and if you've made my Coraline Doll pattern please send me a photo! You can find me on Facebook, Twitter and Pinterest and you can always follow my blog elizabethskitchendiary.co.uk by email. Love, Elizabeth xx
All images copyright Elizabeth's Kitchen Diary